View My Stats

Selamat Datang!

Selamat Datang! Welcome to my blog on Malaysian kuih and food!

Thursday, March 31, 2011

Baby Angkoo Kueh

Previously, I have posted Angkoo Kueh and Sweet Potato Angkoo in this blog.  I just had to do this Baby Angkoo Kueh post because it is so cute.  My sisters brought over this cute little mould from KL when they visited me recently and I just had to try it out.  What do you think ?


As comparison, I took a photo of the different sizes.  The one on the left is the big angkoo, the middle angkoo kueh is without the turtle's head and legs and the right angkoo is the baby angkoo.


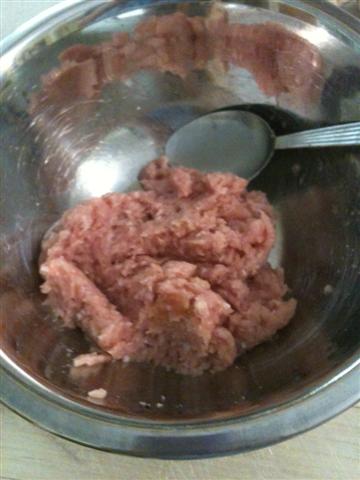
I use the recipe as per my post for Angkoo Kueh.  However, this time I was more adventurous and put 2 different fillings inside the angkoos.  One was red bean paste which was store bought. 


The other was coconut filling.  Recipe is as follows.

Coconut Filling

90g Gula Melaka (Malaysian palm sugar)
1 tablespoon sugar
1 pandan leaf, knotted
50 ml water
1/2 grated coconut (about 10 oz)
1 tsp corn starch

Method

1.      Break up the palm sugar and combine with the sugar, pandan leaf and water in a pot. Cover over a medium flame until sugar dissolves. Add in the grated coconut and corn starch and continue to cook for a few minutes. Dish out into a bowl.


So, isnt the baby angkoo cute ?

Tau Cheong Sui (Soya Bean Milk)

I have been doing my own tau cheong sui for ages.  It is so easy to do your own soya milk.  I know some people who use soya milk machines, which are not cheap.  I use a blender, some cloth bags and mixing bowls.

The cost is minimal (1 packet of soya beans costs about $2.80) and you get good quality and fresh soya bean milk for the whole family.  Definitely no preservatives.  I know - last summer I left one batch overnight to cool down and it turned bad. And the best thing is you can control the sugar, unlike the ones that are store bought.


Tau Cheong Sui (Soya Bean Milk)

Ingredients:
500 gm soya beans
Water
Sugar
Pandan Leaves


Method:


1.      Soak soya beans using cold water for 4 to 8 hrs and if  
         using hot water 3 to 5 hrs.


2.      Drain off the water, take out the soya bean skins, where
         possible.


3.      Using blender, liquidify the soya beans with water and
         pass through a cloth bag.  I use the formula 1 cup of soya
         beans to 3 cups of water.  


4.      Use 2 layers of cloth bag to get a cleaner taste of soya
milk.


5.      Use a  stainless pot, cook the soya milk, stirring all the
time to prevent burning.  Add in pandan leaves, tied in a
knot.


6.      When it comes to full boil, let foam rise to top of pot and
quickly remove from fire.

7.      Remove the foam and return to fire and let it foam up
another 2 more times.

8.      Season with sugar to taste.  


9.      Refridgerate in bottles and enjoy.

Thursday, March 24, 2011

Red Bean & Black Glutinous Rice Sweet Dessert

Suddenly I felt like eating this dessert, which is one of my all time favourites sweet dessert.  This is a variation of Bubur Pulut Hitam which is Black Glutinous Rice Dessert.  I love Red Bean Soup and Bubur Pulut Hitam.  So what a good deal - combining  both of them!  This way, I don't have to put on weight, eating 2 different sweet desserts.

I wish to point out that my photo  of this dessert is not the best.  I am using my Iphone to take the photos.  It's so much easier and convenient uploading photos to my netbook.  I will re-take the photos again.  Definitely I will be cooking this dessert again very, very soon.


Red Bean and Black Glutinous Rice Sweet Dessert


Ingredients
200 gm red beans
80 gm black glutinous rice
1/2 cup of Palm Sugar (Gula Melaka)
6 tablespoons white sugar
10 cups water
2 pandan leaves, knotted
1 cup coconut milk plus 1/2 teaspoon salt

Method

1.        Rinse the red beans and black glutinous rice with water thoroughly until
           the water turns clear.

2.        Add water and pandan leaves in a pot and bring it to boil. Add the red
           beans and black glutinous rice into the pot.  Cover the pot with its lid.

3.         When it boils again, reduce heat and simmer for 1 hour, or until beans 
            and glutinous rice softened, and the soup thickened. The longer you
            cook, the softer the beans, the thicker the soup.

4.         Keep checking the water level, if it has become too dry, add more
            water.

5.         Add in gula melaka and white sugar to taste. Stir until dissolved.

6.         Serve the dessert in small bowls topped with a spoonful of coconut 
            milk.


P.S.    If you are using a crock pot, put red beans, glutinous rice and water
           into crock pot.  Turn it to low (about 8 hours) and go to sleep.   If you 
           like it thicker, add less water.   Add sugar to taste.


Money Bags

I first had this food in a Thai restaurant back in Kuala Lumpur.  It is normally served as an entree, which means it comes in a small plate of 4 pieces.  Which also means, you can just have one per person.  Sigh!  So good but too small a portion for my appetite.  It was so delicious and crunchy I just had to cook it at home - so that I can get enough of it to eat.

It is actually deep fried wontons.  I normally do not like wontons, something about the slimy feel as it goes down the throat kinda puts me off eating too much.   But this !  This is deep fried and crunchy.  Yummy!


Money Bags


Ingredients

200 g mince (chicken or pork)
¼ tsp salt
¼ tsp pepper
1 tsp Chinese wine
Wonton wrappers


Method

1.     Mix mince with salt, pepper and Chinese wine.


2.     Put half a teaspoon on a wonton wrapper.  Wrap up tightly.  Do the same
        till finish.


3.     Heat up oil for deep frying.  Fry money bags in batches until cook.  Drain
        on paper towels.


4.     Serve with sweet chilli sauce. 

P.S.  If you like, you can add in oyster sauce or soy sauce. 
         To make it crunchier, you can also add chopped up carrots or
         water chestnuts.


Friday, March 18, 2011

Green Tea Chiffon Cake

It's been a while since I updated my blog.  With all the Chinese New Year food and cookies that was consumed by my family and me, I thought I would give our stomachs a rest. Otherwise, we would all look as chubby and satisfied as my cat.


I am happy to note that fellow foodies are still visiting my blog, despite lack of new postings.  I know I was supposed to post the Pandan Chiffon Cake recipe, as stated in my previous post.  I will have to delay that in lieu of this new Green Tea Chiffon Cake recipe that I recently found.  Let me know what you think of this chiffon cake.


GREEN TEA CHIFFON CAKE

Ingredients: (20cm tube pan)
(A)  4 egg yolks
      40g castor sugar
      pinch of salt
      1 tbsp honey

(B) 4 tbsp corn oil
     80ml warm water + 3 tsp green
     tea powder
     3 tsp vanilla essence


(C) 100g cake flour
     3/4 tsp baking powder

(D) 4 egg whites
     1/2 tsp cream of tartar
     50g castor sugar
Method:

1. Cream ingredients (A) till sugar dissolved.

2. Add in ingredients (B) in the respective order and mix well before adding
    the next item.

3. Sieve in ingredients (C) and mix till there are no lumps.

4. Beat egg whites with electric beater till frothy, sprinkle in the cream of
    tartar.  Beat till white in colour and add in sugar by thirds.

5. Pour egg white mixture into yolk mixture and mix well.

6. Put batter into a chiffon cake pan and bake at 170C - 180C for 40-45
   minutes 

7. When the cake is cooked, remove from oven and  invert cooked cake on a
    wire rack to cool for 15 - 20 minutes. Remove cake from cake pan and
    leave aside to cool completely.


P.S.   If you like it sweeter, you can add more sugar.  Comment from the  
         taste testers at home was more sugar needed.  They must be    
         missing my chocolate glazing from the Orange Chiffon cake.

Tuesday, March 1, 2011

Orange Chiffon Cake

It's the first day of Autumn today.  Hopefully, it will mean cooler temperatures.  The past month has been very hot and humid in Sydney, just like dear old KL. 

I tried out this beautiful chiffon cake recipe last week.  Been meaning to make chiffon cakes but could not find any cake tins for it.  The cake tin is quite unique, higher than  a normal cake tin and with a tube in the center.  In fact, it has even got a unique name - a tube pan.  I finally got my tube pan, courtesy of my sister Lilian who sent it over from KL.  And so, ta- da ! here is my orange chiffon cake.


Doesn't look too orange, does it ?  Chiffon cake is actually very good for health conscious foodies who love cakes but not the fat content.  There is no butter, only corn or vegetable oil. If you leave it in its original condition, then it's pretty healthy.  Rather like a sponge cake.  You can either leave it original or cover it liberally and sinfully with chocolate topping, like I did.


Ingredients

4 oz flour
5 egg whites
5 egg yolks
3 ½ oz sugar
2 oz cooking oil
1 ½ tsp baking powder
3 oz orange juice
1 ½ tsp grated orange rind
¼ tsp salt
¼ tsp cream of tartar
Orange essence

Method

1.         Beat egg whites with cream of tartar and half of the sugar till very stiff.

2.         Mix egg yolks with flour, baking powder, oil, orange juice, grated  
            orange rind and remaining sugar.  Mix till smooth.

3.         Pour egg yolk mixture gradually over egg whites, folding in just until
            blended.

4.         Pour into ungreased tube pan.  Bake at 170 degree C for 35 minutes.

5.         Once cooked, invert tube pan and leave to cool.


Topping


Melt chocolate over low heat.  You can slice the cake into 2 or 3 layers.  Spread a thin layer of chocolate on each layer.  Arrange the layers on top
of each other. Spread more chocolate over chiffon cake and sprinkle with crushed roasted peanuts.


P.S.   Chiffon cake comes in many flavours.  In KL, the pandan chiffon cake    
is one of the more popular choice.  I did make pandan chiffon
cake  earlier but frankly, I forgot to take photos.  The cake was
finished before I remembered.  That will be posted next time.